Feeds:
Posts
Comments

Archive for the ‘handmade’ Category

We are getting ready to go on a family vacation to the Smoky Mountains! My dad, step-mom-to-be (she’s been a step-mom-to-be for over 10 years now– time to get married Jenn!), little brother & sister and nephew will be joining us at the cabin. I am very much so looking forward to it! Our cabin has the best view. Photos do it absolutely no justice. The kids are excited as well and are eager to get going. This will be our third time staying there. It’s become sort of like a home away from home.

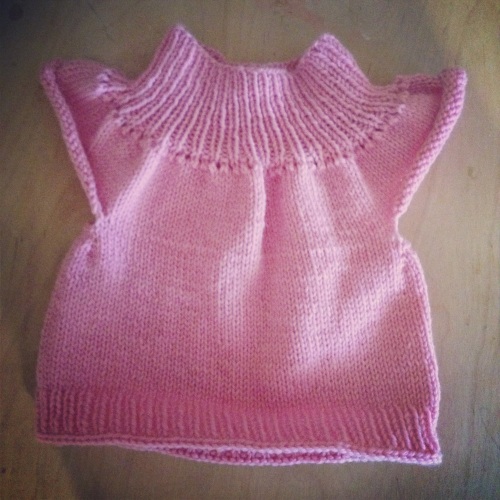
Knit Spring Shirt

I was hoping to have finished a Spring Shirt for each of the girls to wear while we were there, but that didn’t happen. I finished one of them and I’m not too crazy about how it turned out. Looks like I’m going to frog it, again. Yes, again!! It will be the second time. It’s just not fitting Emma right. Arg.

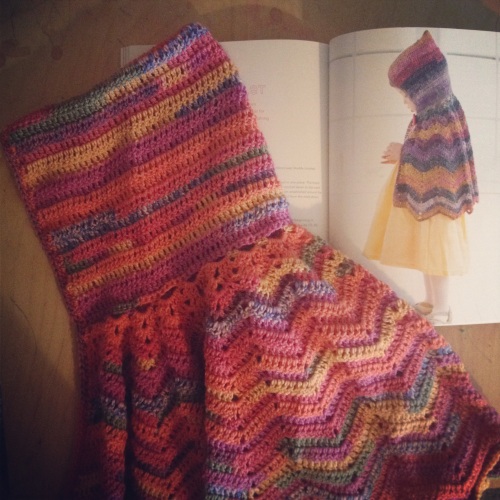
crochet hooded capelet

I was also hoping to have finished two hooded capelets, but again, only finished one. The pattern calls for self striping sock yarn and I got a great deal on sock yarn at Joann’s. The yarn is originally $6 a skein and I got it for $2.50! I’m really happy with how it turned out and will definitely be posting some action shots soon.

I’m going to make this post short and sweet. I really need to get back to packing!

Mountains– here we come!
Read Full Post »

Today I am braving the shave! We are heading over to my in-laws and taking the kids to Chuck E Cheese. I figure that’ll keep me busy all day until it’s time to head on over to  Bald in the Boro, our local event for the St. Baldrick”s Foundation.

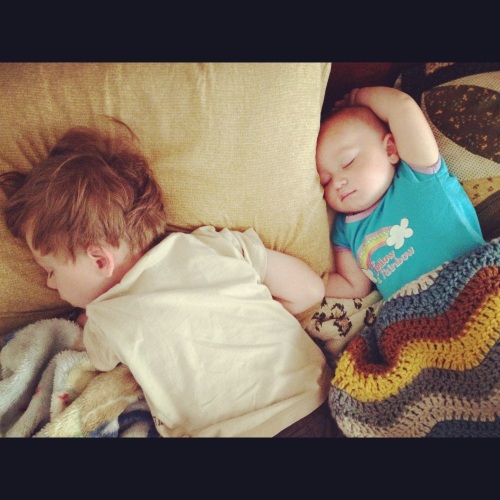
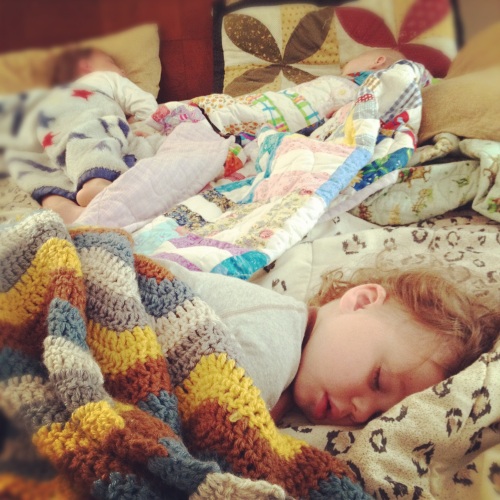
I will make sure to post before and after photo’s tomorrow, but until then I have something else to share with you. I was going through old blog posts and came across this post (I also blogged about it here as well) about my chevron blanket. I’ve since finished it and thought I’d share some photos of it in action.

autumn wheat chevron ripple blanket

autumn wheat chevron ripple blanket

autumn wheat chevron ripple blanket

autumn wheat chevron ripple blanket.

 Pattern (Free) :: Ravelry Notes ::  And this photo inspired my choice of colors.

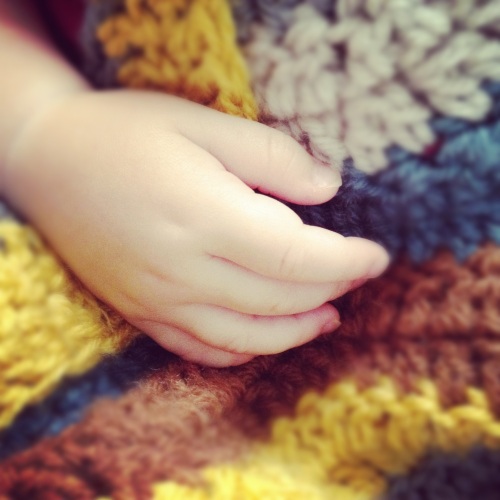
As you can see, this blanket sure does get a lot of love! I am so happy with how it turned out.  I definitely see another ripple blanket it my future…

Read Full Post »

I love crocheting. I really, honestly do. If my hands ever have a spare moment, I like nothing more that to hold a hook and yarn in them. It relaxes me and takes me to my happy place. But recently I’ve been itching to knit. And I feel as if I’m cheating on my hooks.

Yes, it’s true. Silly. But true.

You see, I just love the look of knitted clothing. Over the last couple of years I’ve been collecting some beginner knitting books and purchasing a few patterns online here and there. I’ve even made a garter stitch scarf for Emma a few Christmases ago. It was awful, but I made it nonetheless.

I have a problem that when I first learn something I want to be PERFECT at it immediately. I want it to come easy. And that is not always the case.

I remember five years ago when my Nanny first taught me to crochet when Jacob was only a month or so old. I got so frustrated at times and wanted to just give up. But I didn’t. I kept going. And eventually I got pretty good at it.

I just need to remind myself of this as I am trying to teach myself to knit. Practice really does make perfect. And eventually, if I keep at it, I will get better.

I’ve successfully knitted quite a few things lately. As soon as one things comes off the needles, I immediately cast on another project. And quite often, I have quite a few projects going at once.  Oh, yes.

So what I have I been working on lately? I’ll show you!

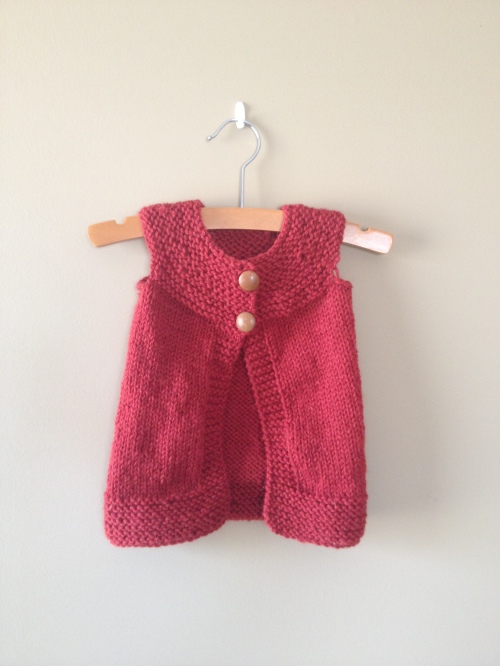
photo (58)

Pattern: Pebble Vest   My Ravelry Notes

photo (61)

Pattern: Plain Vest (Size 12 months pattern is  free, additional sizes available to purchase)   My Ravelry Notes

photo (60)

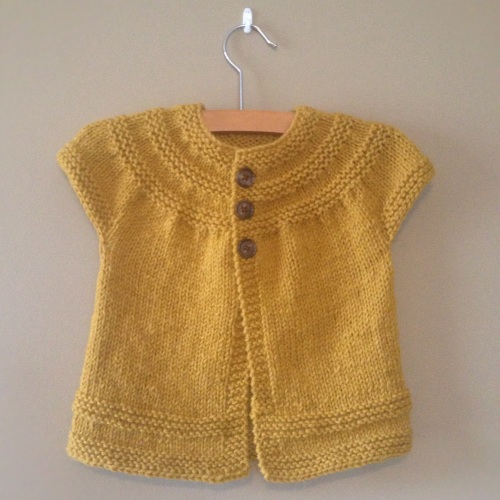
photo (71)

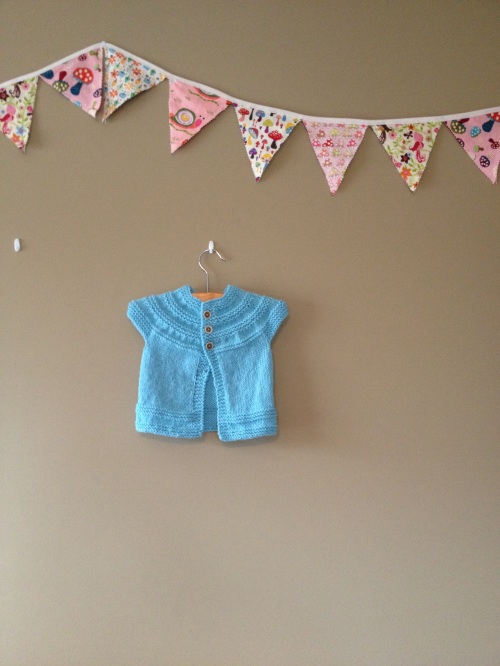
Pattern: in-threes: a baby cardigan   My Ravelry Notes

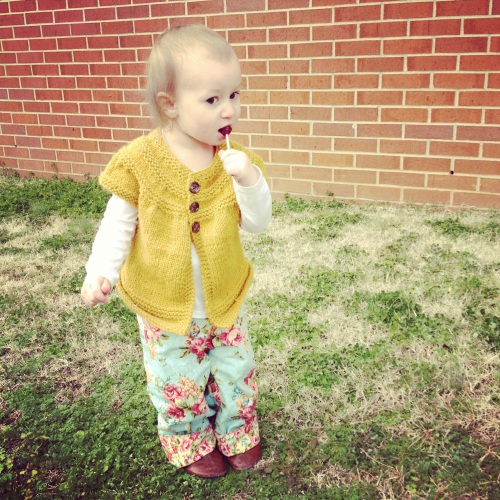
in-threes cardigan

Pattern: in-threes: a baby cardigan   My Ravelry Notes

As you can see in the pictures I have slowly got a little bit better. There is still a lot that I need to work on. But if you are a newbie knitter looking for some simple garment patterns, I really suggest the patterns above. Any questions that I had regarding the patterns were quickly answered by doing a simple youtube search. (Oh, google and youtube— where would I be without you?!)

I’ve mad e a few other things too that I haven’t got around to photographing. But I’ll be sure to share them as soon as I do. One of those finished projects may even be for me. Would you believe it?

I have something else very personal to share with you tomorrow. See you then!

Read Full Post »

If you were to come to my house and rob us (which I hope you won’t), you would be better off breaking into my office where I stash my yarn, rather than my jewelry box, as I have much more money invested in yarn. I’m dead serious.

Now first, let me start of by saying I used to make a ‘living’ (and I use that term lightly since I made nowhere near close enough money to be ‘living’ off of) crocheting hats with some of said yarn.

unfortunately, I am no longer making hats. So a lot of the yarn that I have is leftovers from when I did. I love looking at it though. And it makes me sad when I finish a skein and don’t have one to replace it with. Hoarder? It’s quite possible. And my husband sure does think so.

(I also have a fabric addiction, too. And I have the same mind-set as with the yarn that I don’t ‘waste’ it. I want to save it for the perfect project. One that never seems comes around. And so it just sits. And yard by yard, I add to my collection. But that is a whole other story…)

Back to the yarn… When my shop was up and running I purchased a lot of yarn in bulk that I used a lot of. It just sat in boxes on our office floor. I HAD to figure out a way to get it out of the box and store it nicely. I got the idea for my yarn storage system from small yarn shops. Most of them seemed to store their yarn in small square cubby units.

In Jacob’s room we have a cubby unit that we use to store toys and books, which turns out to be the perfect thing to store your yarn in also! We made a trip to Target and purchased the same exact one in black to match our bookshelves that are also in the office. I was so excited to put all of my yarn in each cubby, and it looked SO much nicer than in a box.

The yarn that doesn’t quite fit in it is stored nicely in two baskets and whatever you’d like to call that black storage thing in the middle. My scraps are stored here and there in different baskets and drawers all over the room…

I would eventually like to get another cubby unit that I could possibly mount on a wall. Our office is the tiniest room in the house. And it holds a lot of things: computer desk, a printer desk, two big bookshelves, my yarn organizer, and a smaller plastic drawer set that holds different odds & ends– something that I’d just love to get rid of… So I figure it would be beneficial to utilize some of our vertical space.

Maybe if I ever get into the hat business again I’ll make it happen… We’ll see. How do you store your yarn??

Read Full Post »

Again, here is another project that I have been working on for months now. Well I shouldn’t say ‘working on for months’, because technically, that’s not the truth. The truth is, I started working on it months ago, was really into in months ago, worked on it for a couple of days months ago, then put it down months ago and haven’t picked it up since. I have a big problem with starting a project and not finishing it, if you haven’t noticed.

I need to complete three more squares to finish the front and figure out something to do with the back. I have idea, I just need to figure it out. This too will find its new home in the girls’ room. The plan is to get them matching twin size beds and skip the whole toddler bed thing. Which would mean that if all goes well with this one, and I ever complete it, a new one will be in the works too!

I originally found the pattern while browsing through ravelry. It’s by Beata Basik  and available on her ravelry page  or through her blog, rose hip.

 Although I have another granny blanket in the process, (again, one I haven’t picked up in months) this is my first time actually joining granny squares. I think I did an OK job… definitely could use some work though.

In other news, I did add a significant amount to my chevron stripes blanket. I would have added more, but upon finishing my last row I noticed I made an error somewhere in the row before. So I tucked it away for the day and hopefully tonight I will find some quiet time to try to figure out where I went wrong. That’s always fun… 🙂

Read Full Post »

I drew this cute little russian nesting doll with the intention of embroidering it. I kept her simple. Very simple. Almost too simple now that I look at her… 

Anyway, if you’re wondering how I turned this:

into this:

I’ll show you!

First you take your drawing (or embroidery transfer) and tape it to a window. I taped mine to my sliding glass door.

Then you will want to take your fabric and tape it over your pattern.

Next step, tracing! Most people use a fabric marker to trace embroidery patterns, since they are water-soluble and any visible lines will come off with a little bit of water. My fabric marker is gone and has been for a while now, thank-you Emma. So I just use a pencil. Whatever works, right?

After you have your whole pattern traced onto your fabric you are ready to start embroidering! Now that was easy, wasn’t it?

I plan on getting this image scanned into my computer very soon. And as soon as I do, I’ll be sure to share it with you!

Read Full Post »

Is it just here in Tennessee, or has this Winter weather been pretty crazy where you live too? I am the first to admit that I am not a fan of the cold. I am a true Floridian through and through. Ever since moving up here 4 years ago now, I dread this time of year and become quite the homebody and only go outdoors whenever it is absolutely needed.

This past week we’ve had some pretty warm temperatures. Don’t get me wrong, I am NOT complaining! I am actually loving it! Minus the tornadoes.

I took full advantage of the weather and went ahead and dressed Sophia in her vintage cardigan (pattern info and yarn blogged here). The photos I took of her in action were pant-less, but I promise before we left the house I put some on her 😉

ps. please excuse the blurry-ness of the photos. this little lady just won’t sit still!

Read Full Post »

I set a goal for myself this year to make one handmade Christmas ornament a month. Leaving me with 12 new handmade ornaments for our Christmas tree this year. I chose to do it this way because by the time Christmas comes around I find myself overwhelmed with everything. Every year I say I will begin making Christmas gifts in July. And every year I’m busy working away last-minute trying to get things done. And half of it remains incomplete or not even started. So instead, I am starting early. WAY early.

I was inspired by the book Falalala Felt to make this little blue bird. It’s based on the ‘little birds garland’. My printer is out of  ink so I couldn’t scan and enlarge the template in the back of the book. So instead I just winged it.

Please excuse the sloppy blanket stitch. It’s my first time using that stitch so it’s looking a little rough! Besides the sloppy stitching, I think it came out pretty cute! One ornament down,  eleven to go.

Read Full Post »

I know just about every mom uses a bib here and there. For spit up when babies are new and for eating solids when they are a little bigger. Then there are those babies (like mine) that wear them constantly for the first 5-6 months or so. I really mean CONSTANTLY. My babies are projectile spewers (is that a word?). I’m not talking a dribble her, a dribble there. I’m taking A LOT and VERY frequent. Not only would I have to change the babies clothes multiple times a day, but my clothes  would also need to be changed as well. There were also constant spit up splatter marks all over my hardwood floor. Am I painting a pretty picture for you??  Burp cloths and bibs really were my best friends.

In using them so often I found that  terry cloth, flannel, and knit fabrics were the most absorbent (and soft).  Soft terry cloth works best, but flannel comes in many cute prints and is very easy to find (if you’re looking to make your own). I loved our flannel bibs. I made bunches of them.

For burp cloths, nothing compares to a prefold cloth diaper. The Gerber ones are OK if that’s all you can get, but chineseindian diaper service quality prefolds work even better and are extra absorbent.

I know you all have seen the embellished prefold with the fabric down the center. They are super cute, but a lot of them that are made have a cotton fabric sewn down the center. Which is adorable. But, cotton fabric is not that absorbent. That’s why when embellishing prefolds I like to use knit fabric. It’s cozy & soft to the touch and more absorbent, especially when sewn onto a cloth diaper. (I’d just like to add that I absolutely hate sewing with knit fabric.)

Now remember all those baby girls that I made all those teeny hats for? Well I got to work making some bibs for some of those special little cuties. I’d like to get some new burp cloths made up too. I like to dye my cloth diapers pretty colors, so that process requires a little more time. Like kids have to be sleeping kind of time.

Hopefully these little ladies they won’t need them as often as my babies did (especially Jacob & Sophie), but if they should, they will work great!

Read Full Post »

I love to match the girls. It drives my husband nuts.

My mom dressed my sister and I in matching clothes growing up. I remember as I got older the novelty of matching wore off and it was pretty uncool. But for now, while they are little, I will enjoy dressing them alike.

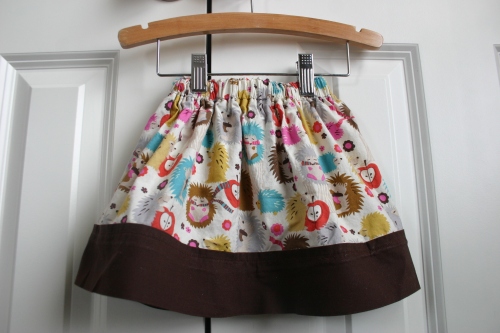
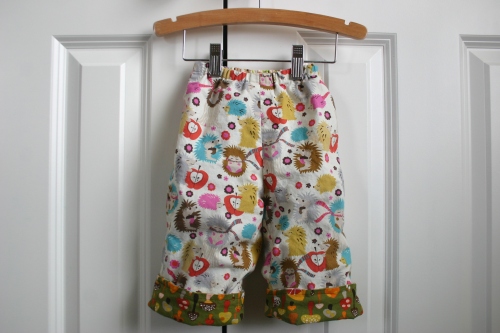
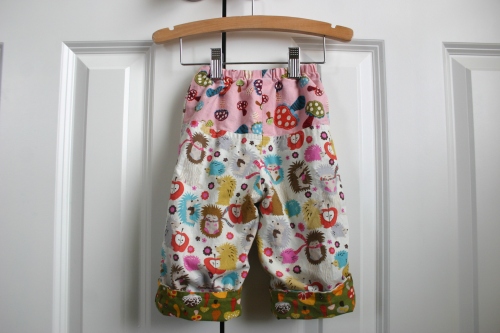
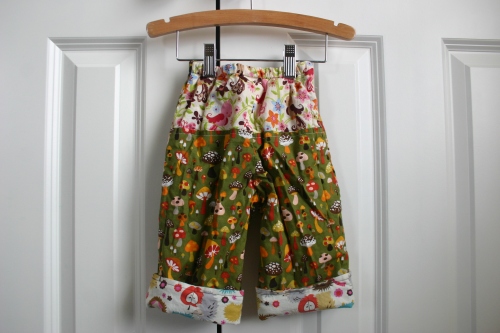
With that in mind, I sewed each of the girls something special using the same adorable Michael Miller hedgehog meadow fabric. Emma received a skirt while I made Sophie the quick change trousers (pattern by Anna Maria Horner and available in her book Handmade Beginnings).

The skirt was easy peasy. The pants on the other hand were a bit more difficult. They are reversible. I’ve never sewn anything reversible. So that in itself was a challenge. I will also admit that I am a very novice sewer. So pattern reading and following directions require a lot more attention from me. After finishing the pants, I realized that the pattern was actually quite simple. I find that the first time I make something it’s usually more difficult than the second.

Front

Back

Reverse Front

Reverse Back

The fabrics came together quite well. I love the contrasting fabrics on the bum and cuffs. So cute!!

Both of the girls have already worn their new duds (the pants had just come out of the dryer, which is why they are wrinkly). I have yet to get a photograph of them in use yet, however, they look mighty cute matching and all if you ask me!

Read Full Post »

Older Posts »